Archive | Uncategorized RSS feed for this section

Recipe Remix?: Pear and Walnut Pie

10 Feb

Tonight is my monthly Cookbook Club meeting and I thought I’d kill some time before it starts and post the recipe + pics of the pie I just made. I’m posting it as recipe remix QUESTION MARK because I only changed, like, two things, so it’s not much of a remix, but still.

This month’s featured chef is Tyler Florence. Although it seems everyone and their mom knows who Tyler Florence is, I did not. I don’t have cable so Food Network et al is out. I don’t know how I’d find out about new-to-me chefs anymore if not for Cookbook Club. I wish I had had more time to peruse his recipes and cookbooks, but as it turned out I just sort-of-randomly picked this recipe from the small dessert section in his “Tyler Florence Family Meal” cookbook, which my mom had picked up for the occasion. Because I can’t find any handy-dandy links, I’m going to go ahead and reproduce the recipe here, so you can recreate it if you want.

pie

Tyler Florence’s Pear and Walnut Pie with Apple Butter Creme Fraiche

shared from “Tyler Florence Family Meal”

Makes 1 9-inch pie

I am not reproducing the pie crust aspect of his recipe because it is just your run of the mill pie crust recipe and I cheated and used Pillsbury ready-made crusts, anyway.

Ingredients:

1/2 c. walnuts

8 Bosc Pears (I used D’Anjou because the Bosc variety at my local grocery store were all in poor condition)

1 c. lightly packed light brown sugar

2 tbsp. honey

1 tbsp. all purpose flour

2 tsp. ground cinnamon

2 tbsp. dark rum (I used Whiskey instead and then added a tsp. of Pure Vanilla Extract to sweeten it a bit more)

2 tbsp. fresh lemon juice (you can squeeze this out of one lemon. Press down as you roll the lemon along your countertop, then cut in halves and squeeze – you’ll get more juice out of your lemons this way)

1/2 tsp. kosher salt

1 egg, lightly beaten (for egg wash)

8 oz. creme fraiche (usually you can find this near the sour cream, yogurt, or specialty dairy at any grocery store, but I had trouble finding it this time, so I had to get it at Whole Foods)

1/2 cup apple butter

1. Preheat the oven to 350 degrees. Spread the walnuts on a rimmed baking sheet and toast until they are golden brown, about 10 minutes, stirring once or twice. Let the nuts cool for a few minutes, then coarsely chop. Leave the oven on.

2. Peel and core the pears and cut into 1/8 inch slices. Place the pears and walnuts in a large mixing bowl and add the brown sugar, honey, flour, cinnamon, rum (or whiskey + vanilla extract!), lemon juice, and salt. Toss gently to combine thoroughly.

3. Lay the dough in your pie pan and the fill with the pear and walnut mixture. Place the remaining dough over the filling, trim the excess dough to a 1-in overhang and use your fingers to crimp the crust/edges. Brush the crust with an egg wash. Cut a round hole in the center of the pie and make several 1-inch slits in the crust. Place the pie pan on a baking sheet to catch any drips (I did have some overflow, so def do this).

4. Bake the pie for 40-50 minutes, or until the crust is a beautiful golden brown. Let the pie cool for 15 minutes before serving warm or at room temperature. Serve the pie with dollops of creme fraiche.*^

*Whip the cream fraiche until fluffy. Add the apple butter and stir until somewhat incorporated; you should be able to see swirls of the apple butter (this did not happen for me).

^I highly suggest letting this pie fully set over the course of several hours before serving – otherwise, it is still delicious but basically soup, as I learned when I served it, still warm-ish, 40 minutes after baking. You can always warm it in the microwave if you want that “just out of the oven” sensation.

New feature: Recipe Remix!

23 Jan

In addition to my new Recipe Review posts, which focus on my experiences cooking other people’s recipes, I am also going to occasionally write Recipe Remix posts. These will be my own twists on existing recipes and, like today’s post, will also include family recipes that I have tweaked.

enchiladas

Tonight I made my mom’s famous enchiladas – with some key changes. Although my mom’s enchiladas are famous in our family for good reason (they are amazing!), they are a time-consuming, multi-pan, messy endeavor. Which is why we’ve grown up only eating them during the holidays or for other special occasions. This new recipe which I’ve adapted from her original recipe to include several Rick Bayless techniques (and his packaged red sauce) clocks in around an hour start to finish (compared to her original recipe’s 1.5-2 hours), uses one pan for the sauce and one for the enchiladas (and a few prep bowls), and tastes incredibly similar to my mom’s enchiladas.  I can now make one of my favorite recipes much more frequently, using less ingredients and taking much less time!

Our recent cookbook club – cooking Rick Bayless this time around – was an insane success. My mom brought his Enchiladas Suizas, which she had also made over the holidays, which are the only green-sauce enchiladas I have ever liked, let alone loved. During the holidays she also made two batches of red sauce enchiladas – one the way she has made them for years, and one batch using Bayless’ Frontera brand red sauce. His red sauce is surprisingly good for stand-alone packaged sauce, but it was missing some of the depth that my mom’s own sauce has.

She also had recently been experimenting with different ways to deal with the corn tortillas. We have always fried them in oil, about 10 seconds or less each side, to make them pliable and add to the flavor. This process takes time and can be messy. In one of the recipes she was following from Bayless, he recommends laying the tortillas out to dry for a bit before frying them – this way they absorb less oil, and that is what she has been doing lately. On a recipe I found online, he instead suggested brushing each side of the tortilla with oil, stacking the tortillas in a plastic bag, and microwaving for 1 minute. This technique saved me a ton of time and energy, but the tortillas were not quite as pliable as I would have liked – next time I might either microwave them a little longer or put the tiniest bit of water in the bag, too, to get more of a steam effect.

Lastly, after having made several Bayless enchilada renditions, Mom surmised she’s been overcooking her own enchiladas. They always stick to the pan a little and can sometimes be tough to cut through on the very bottom/edges. Bayless, for the most part, uses warm ingredients and when he puts his enchiladas in the oven it is essentially just to melt the cheese and meld the flavors a bit more. His cooking time generally falls in the 10-15 minute range, whereas ours was landing 30 min with foil and another 10-15 without for 45 minutes total cooking time. This one seemed sort of no-duh to us after the fact – why did we ever cook them for so long? Hindsight is 20/20, what matters is now we know better.

Here is my recipe remix for a quicker, easier way to make my mom’s famous enchiladas, which are, in my opinion, some of the best you’ll ever eat:

Mom’s Enchiladas REMIX!  (for full effect,  imagine someone shouting that at the beginning of a JLo song)

Makes approximately 12-14 enchiladas. Serves: 4-6

Ingredients:

2 – 8 oz bags Frontera brand Red Enchilada Sauce

1/2 a yellow onion, chopped (I didn’t even use all of this, so maybe try for a smaller onion or just chop even less)

2 cloves garlic, minced

1 whole, cooked, store-bought rotisserie chicken (this is my cheat’s way of avoiding having to cook the chicken first, but there’s a fair amount left over if you use this method so plan on having some chicken leftover or else buy 1 lb of raw chicken and cook it yourself)

corn tortillas (I always buy the 30 pack because I know I’ll use them, but I only used 13 here, so you can buy less if your grocery store sells them in smaller quantities)

2 cups (1 small package) shredded monterrey jack cheese (or mexican cheese blend)

1/2 tab mexican chocolate (Abuelita or Ibarra brand, either’s fine – find this in the ‘Hispanic Foods’ section of your supermarket)

oil for the tortillas and a little for the pan

1. I like to chop/dismantle everything first so I’m ready to assemble when the time comes. Leave the chicken sitting out on the counter for 10 minutes or so to cool a little while you ready everything else. Chop your onion and set aside. Mince your garlic cloves and set aside. Pour your shredded cheese out into a bowl and set in the fridge until you need it. Cut your octagonal chocolate tab in half.

2. Fill a small bowl with some oil and use that to brush oil on each side of each tortilla – then stack them, place them inside a microwave-safe plastic bag, and heat in the microwave for 1-2 minutes. Set aside. I oiled 18 tortillas because I wasn’t initially sure how many the recipe would make – next time I will probably oil 14 instead, that way I still have an extra or two to cover any mishaps but haven’t wasted a bunch either.

3. Now, “carve” your chicken. What this really amounts to is you just getting in there with your hands and ripping it apart, grabbing every last piece of viable meat you can and setting it aside in a bowl. All I have to say is get ready for some messy hands. If you opted to cook your own chicken first, obviously let it cool before handling it, but then just shred it and set aside in a bowl. If you’ve used a rotisserie chicken as I have, you may want to put about half of what you’ve shredded away at this point – before saucing what you will use for the enchiladas. Or you can just sauce all the chicken before splitting it, and use the rest for tacos or chilaquiles tomorrow.

4. Now that you’ve got all your ingredients prepared, you can make your sauce, which- because we’ve bought our cheat’s packaged sauce – is dead easy. Heat up a pan and about 1-2 tablespoons oil, throw a scant handful of onion in and let cook until nearly translucent, then toss your garlic and stir all this around for 1 minute or so. Pour in both bags of red sauce and let it heat up a little before adding in the 1/2 tab of chocolate – lower the heat a little and stir frequently until the chocolate is melted.  It’s okay if there is a little chocolate “grit” leftover, so long as there aren’t huge unmelted chunks wandering around. *Right before I add in the chocolate, I also turn my oven on to preheat at 350 degrees so it’ll be ready by the time I’m ready.

5. Once your sauce is ready, you can assemble your enchiladas. First, ladle some sauce into the pan you’re going to use for your enchiladas, making sure to coat the bottom and up the sides a little if you can. Next, add about a ladle and a half of sauce to the chicken and stir to coat – reserve the rest of the sauce for the top of the enchiladas. Use a plate as a work surface to roll each enchilada. Place the tortilla on the plate, put some chicken on the tortilla (less than you would think), add cheese and onion, then roll into an enchilada. Place the enchilada seam side down in your pre-sauced baking dish. Continue assembling until you run out of room in your baking dish. *I use a 13×9 inch pyrex pan and I can normally fit about 8-9 one way, then 4 (two-deep) going the other way (at the ‘feet’ of the initial row)

6. Now ladle the rest of the sauce over the top of the enchiladas, using the ladle or a separate spoon or spatula to spread the sauce around and then down the sides if possible – you don’t want any naked tortilla showing. Take the rest of the cheese and spread all over the now-sauced enchiladas, making quite a thick cheese layer. Pop the pan in your preheated oven and bake for 15 minutes or until the cheese is melted to your satisfaction, then serve immediately.

enchiladas2

Notes: The key changes to my mom’s original recipe were in how I oiled the tortillas (did not fry them), how I made the sauce (doctored a packaged pre-made sauce, whereas she used to doctor a can of straight red chile sauce using about 3 more ingredients than I did), and how long I cooked the enchiladas for (15 as opposed to 45 minutes). Additionally, my mom’s original recipe does not sauce the chicken, but instead has you saucing the tortillas before you roll them – I may still play with this aspect a bit and see if it makes a difference, but I liked the way this turned out, so we’ll see.

P.S. Thanks to my mom for her expertise and suggestions on how to improve her own already amazing recipe!

New feature: Recipe Review!

16 Jan

One of my quasi-resolutions for this year is to start cooking more and to try new recipes while doing so. Cookbook Club has officially surpassed the one year mark (woot!) and is still going strong, and through our chef-centric meetings I have definitely cooked out of my comfort zone many times in the past year. But we only meet once a month and, especially as work got busier toward the end of the year, I found myself practically ONLY cooking for cookbook club, and increasingly looking for simpler recipes. The chef for our next meeting is Rick Bayless and, because I couldn’t get the day off to cook, I’m finding myself in the same boat this time around – I’ve either got to find something more complex that I can make the night before, or make something very simple the night-of. Since I’m not always able to get my cooking fix fully sated by Cookbook Club (and since, even if I am, it only occurs once a month), this year I’m also turning to Pinterest for inspiration.

Recently, my mom and I were talking about how many things we pin that we never look at again – I pointed out, “I probably have enough recipes pinned to make one new dish a day for a whole year, and I haven’t tried a single one”. When I got home, I took a look back at all of the recipes and tips I have pinned on my “Foodstuffs” board on Pinterest – there are actually *only* 189 pins currently (although I add to it pretty regularly), but that’s plenty to be getting on with. This year, I will cook recipes found through Pinterest and review them here.

Part of the impetus for this is also my poor, deprived husband. We work opposite schedules and I am constantly out with friends or my family – he is more of a homebody, especially on his working days, and actually generally likes to spend his money elsewhere than on dining out, whereas I am a definite foodie and I dine out often. All of which is to say: we don’t share meals very often. This year I declared Tuesdays “our day”. It’s the last of my two days off each week, and it’s one of his longest, most tedious days at work due to being in meetings all day. I’m trying to mellow out and get to bed a little earlier since I return to work the next day, and he is just trying to relax after his most hectic day of the week – it seemed a natural candidate for a day when I could stay in and cook a meal that we can share together. And instead of turning to my few old standbys, I’m now turning to Pinterest (and the food blogs these recipes are pinned from) to try new dishes. This is also a great way to find recipes that are more up Trevor’s alley – most of my standbys are just that – MY standbys: he doesn’t necessarily love them just because I do.  After our dinner tonight, I told him I have been looking for more “meat-and-potatoes” recipes and he asked why. I said, “Well, you’re kind of a meat-and-potatoes guy, right?” and he replied, “More meat than potatoes” – which, really, I think just proves my point.

Tonight I made Cowboy Casserole from The Cutting Edge of Ordinary blog. I had pinned this recipe almost a year ago and never looked at it again until my more recent searches for Trevor-friendly food. It uses canned Cream of Mushroom soup, something I have staunchly avoided as I am neither a mushroom fan nor a fan of retro Frankenstein casseroles. Don’t get me wrong, I love casseroles – I just don’t trust those that use ingredients such as cans of soup, packages of gravy powder, canned vegetables, and the like. They come from a simpler time – when we didn’t know enough to distrust packaged and processed foods the way we do now. For reasons I can’t fully explain beyond saying that they just kind of grossed me out, I have always stayed clear of these types of casseroles. Until now.

First, despite the blogger’s “looks like dog food, tastes delicious” disclaimer, the picture of Cowboy Casserole that I had pinned looked like tater-tot-shepherd’s-pie and it looked delicious to me. Second, tater tots. Third, tater tots. Fourth…well, you get where I’m going with this. I love tater tots! Despite my abhorrence for all casserole recipes using processed/packaged/canned elements, I actually eat a lot of frozen food. Mostly, because it’s really convenient when you routinely work until 9pm or later to be able to come home, pop something in the microwave, and eat 5 minutes later. Fifth compelling reason to make this dish? MEAT. Since Trevor is basically a carnivore AND the dish involved my beloved tater tots AND it was described by the creator as a “stick to your ribs” kind of meal, I decided to brave the condensed cream of mushroom soup AND canned corn to try this recipe.

And it WAS delicious, guys! And it does look kind of like dog food, once you scoop into it, but it is still DELICIOUS. There is nothing mushroom-y about this casserole, despite having cream of mushroom soup in it, so put those worries to rest (or be disappointed if you love mushrooms, I guess). It was super easy and relatively quick to throw together, and this dish could easily serve a crowd – with only two of us, we will likely have leftovers for days. This would be a great potluck and/or family dish – there’s a lot to go around and it is very filling. 

cowboycasserole


Cowboy Casserole, Grade: A

Notes/variations: I used regular tater tots because my grocery store doesn’t carry the Ore-Ida Crispy Crowns – I also used the generic brand, all of which worked just fine. I keep my two oven racks pretty low/high, so I switched from the top rack to the bottom rack for the last 10 minutes or so, just to make sure the top didn’t get too browned. She doesn’t say in her recipe, but I sauteed the onions and garlic in a little butter and I did not put foil over the casserole at any point in the baking process.

Here, again, is a link to the recipe from The Cutting Edge of Ordinary blog. FYI she notes that the recipe is adapted from a recipe on Taste of Home.

Here is the direct link to repin the original image/link. Or you can just pin off my own image if you want it to lead here. If you were referred here by Pinterest, thanks for visiting!


Thanksgiving 2012

22 Nov

Like everyone and their mom, I will get in on the neotraditional Thanksgiving blog posting today, despite not having posted anything in I-don’t-even-know-how-long. I just think its healthy to remind yourself, at least once a year but hopefully more often than that, of all the things you have to be thankful for – especially when we (I) spend so much time thinking about all the other shit we are most definitely NOT thankful for. It’s nice to step away from that for a minute here.


1.) I am thankful for my family. My mother, my brother, my sister-in-law, and my grandmother locally; my father in San Antonio; and the rest of my extended family (and my sister-in-law’s family, whom I love) scattered around the country. I’m also thankful for my husband’s family – my mother-in-law, Darlene, whom I adore, especially. Most of all I am thankful for my husband, Trevor, who is my perfect match in so many ways that I usually forget about when thinking about all the ways we aren’t well-suited for one another. He has given me love and acceptance in measures equaled by no one except my own mother. I love him so much and am so grateful that he is in my life and also that he grins and bears these holidays with my family and me, even though he is sort of a grinch/scrooge, because he knows how much it means to me (and also enjoys free meat).

2.) I am thankful for my job. Yea, the same job I have been complaining about for 4 years and threatening to quit for the last 6 months. I am happy to have a job, and, sure, I wish it paid more. I wish it wasn’t so hard. But I am thankful for my amazing boss, Eliot, who has stuck with me through good times and bad and taught me a lot about management and business in general. I am thankful for the casual and laid-back work environment at our shop. I love (most) of our customers – they’re some of the nicest people around, and also really good tippers.

3.) I am thankful for Netflix. Thank you for rescuing me from the hell that is cable tv. I also liked it when you paid my husband A LOT of money, but not so much when you wore him down into the ground and then he left because you’re a**holes. Anyway, I’m still thankful for you, Netflix, because I’m going to go watch another Glee episode after this, and maybe some Doctor Who later.

4.) I am thankful for my tiny kitchen that has nonetheless miraculous amounts of storage space. I’m also thankful that we decided not to move just yet. I would be really mad if I were packing right now.

5.) I’m thankful for all the pets I have had in my life. I’ve been thinking about this a lot lately, especially after reading Fiona’s letter. I don’t have any pets right now, and what with living in an upstairs apartment and working all the time, this is probably for the best. I’ve been thinking about Max a lot. Trying to turn a negative into a positive, but it’s just not really possible. Even though that situation sucked, today I am just trying to be thankful for the time I got to spend with him, even though it wasn’t enough and it could’ve been longer.

6.) I am thankful for all the friends I have had over the years for whom time and distance mean nothing, change nothing. I love you guys!

Happy Thanksgiving, everyone!

feedback

3 Sep

Asking for feedback on creative projects is so nerve-wracking for me.

A.) I always feel like I’m bothering whoever I am asking. When I spoke about this with Randall, who I recently asked to look over some recent writing of mine, we agreed that, in reality, it’s nice to get someone else’s project in your inbox to look over because it gives you a valid excuse to step away from your own. We joked about what horrible parents we are to our “babies” – the projects we’re working on. Everyone knows I’m a horrible blogmom, for example. But what you didn’t know (until now) is that I’m also a horrible storyparent. I get ideas and I write a few pages and then I kind of just drop it. Sometimes I make my way back to it eventually, but mostly my hard drive is full of just-started stories and incomplete outlines. This is another reason it’s nice to get someone else’s work to look over – it makes you feel like you’re doing something useful, instead of just, you know, NOT writing like normal.

B.) Well, it’s feedback. So, you know, you have to take the good with the bad. When you ask for feedback on a project, you’re basically asking someone to tell you what’s wrong with it. I don’t want anyone to “go easy” on me with the criticism, because if you sugar-coat everything it’s hard to be truly constructive. But, at the same time, once I’ve solicited feedback I just kind of go into this full-body wince while I wait for the response. It feels like when you are expecting to get smacked.

C.) Then I always doubt when I should ask. My initial inclination is just to ask when I feel like I need it, which seems to make sense, on the surface. But sometimes that happens quite early, when there’s not much material, and then it can be quite discouraging if someone says something really damaging to your ideas about your project (intentionally or, as is more often the case, not). When your “baby” is so young you kind of wonder, should I be protecting and sheltering it right now instead of tossing it into the sea to see if it sinks or swims? But if you don’t let anyone read the damn thing, then you can’t really get anywhere.

I content myself with asking one of the few people I know who has a similar process, who has appreciated my work in the past, and has always been honest with me. Somehow, if I just ask one person to look it over it feels safer, less intrusive, and so far, that has been what works for me.

D.I.Y. Nail Polish

23 Jul

If you are anything like me, any time you successfully carry through a d.i.y. project, no matter how small, you are disproportionately impressed with yourself.

Today I came across a pin on Pinterest that claimed you could make custom/colored nail polish by mixing eyeshadow powder with clear nail polish. Now, this is actually really logical and seems like it should work, but I have deep skepticism of a.)”easy” D.I.Y. projects found online, and b.) my own inability to make anything turn out like it should – so I wasn’t sold at all.

But, guess what guys?! I am here to tell you it did work, and it was amazing (and therefore, I am amazing?)!

Step One: Gather your shiz

We clean out and save random food packaging and the like for just these sorts of purposes – so I used the top of a pudding container as my palette. I also grabbed a q-tip I didn’t end up needing, a couple shadows to play with (though I only tried one), the clear nail polish, and a paintbrush.

Step Two: Put some loose powder on your palette

Step Three: Drop a few drops of clear nail polish into the polish, then mix!

The coolest part about this little D.I.Y. is that you control the translucency of your homemade polish – play with the amount of pigment vs. clear polish to get a look you like and create depths of color that are hard to find in store-bought polish.

Step Four: Assess and Admire

I need to get a better camera/set-up, but maybe you can sort of see the clumpy quality of the polish on the middle nail. As one might assume, this stuff is more apt to clump, so mix and apply quickly for the best results. I let mine dry then went ahead and put a clear coat on top.

I’m excited both because a.) SUCCESS!, and b.) next I want to try mixing pigments to make custom colors. GUYZ!

home

10 Jul

I have a real problem thinking of our apartment as a home. Not because it doesn’t feel like one to me – I get that distinct full-body sigh feeling when I walk in the door after an especially trying day, happy to finally be home.

But it’s a mish mash of different stuff. Some of that is a product of my husband, Trevor, and my’s weird, totally mismatched combination of stuff we each inherited one from the other. I don’t know where I got the idea that a true home has to have a cohesive design scheme, but somehow it stuck and the lack of cohesion in our own apartment is one of things that most enforces the feeling that this isn’t really a home.

The impermanence of living here has sort of paralyzed me, stopped both of us really from making the changes that would be necessary to make this space we share feel more homey.

When we moved in, I wanted to paint the walls, but Trevor reasoned that we wouldn’t be here very long and it would be a pain in the ass to paint them over when it came time. Sound reasoning, except we’ve been here for 4+ years now. Still I’m happy we didn’t paint. I have in the past been momentarily tempted by wall decals and other non-permanent solutions, but that thought – “well, we won’t be here all that much longer, anyway ” – always stops me in my tracks: it’s not worth the effort.

As each year passes, instead of getting better – a la “well, looks like we’ll be here awhile afterall” – it actually gets worse because even though we have stayed here longer than we ever thought we would, there is always the desire to move.

Every time our lease is up we sort of go through this hemming and hawing before finally just deciding now is not the best time for a move. Inititally, we said we wouldn’t move from this apartment until we saved up the money and found a house to buy. 3 years in we hadn’t saved enough, but we started considering just moving to another apartment after a string of lousy wall-sharing neighbors. Ultimately, we decided to soldier on. Last time our lease was up, a month or two ago, we decided to sign a new one but get serious this time – we only signed a 6 month lease, and I’ve been trying to do my share of saving to combine with Trevor’s already sizable savings in the hopes of being able to purchase a home before our next lease term is up.

Today, after considering bills and a few upcoming big expenses, including a trip to NYC in the winter, I told Trevor I don’t think we’ll have enough saved by the end of this lease to make the huge committment of buying our own home. He said he had already suspected that would be the case. But now, knowing I will be here not just the next 4 months, but an indefinite and undefined amount of time stretching out in front of me, I find myself finally thinking it might be time to redecorate. Nothing crazy, no painting involved, but just a general cohesifying (that should be a real word). There is something, however, upon finally breaking down and admitting this, that makes it feel like defeat, like we’ll never leave – I just have to get past that feeling, though.

I think the easiest way to accomplish this “cohesifying” without disqualifying a majority of his or my own stuff is to create separate spaces within the apartment that each feel distinct, and create design “moments” within each space that uses the stuff we already have in new combinations. There is also some stuff we just need to get rid of – stuff that doesn’t fit anywhere, isn’t important to anybody, and won’t be coming with us to wherever we move in the future anyway. Those are my three rules for getting rid of stuff – that and not even stepping foot in Trevor’s mancave, he can sort that out.

Now if only I could actually find the time for all this.

ring

30 Jun

Trevor likes to leave his wedding ring lying around. I have a friend who once told me a story about how her husband had a habit of continually leaving his ring laying about, and she had told him she didn’t like that very much, but one night they were out at the bar and got up to leave and she noticed his ring on the bartop so….

…she picked it up, walked outside, and threw it down a storm drain.

She did so while saying it clearly didn’t mean that much to him, so it shouldn’t be a big deal. She was pissed. He was pissed, too, but I’m pretty sure you can’t top a lady who is willing to throw your wedding ring down the drain to make a point.

Anyway, I might be a little fuzzy on the exact details, but that’s the gist of the story.

Now, I realize most people hearing this anecdote will be like “geez, that’s a little extreme”, but there is something seriously appealing to me about this story. I feel a kindridship with this friend, and I remember just being in awe of her when she first told me this story. I felt this strange mix of respect and intimidation – like “man, I really don’t want to get on your bad side, but…you go, girl!”

So, anyway, Trevor leaves his ring lying around all the time – most often in the bathroom before he goes to bed. It’s loose-fitting, so he takes it off when he stands over the sink getting ready to go to bed. It would be different if this is where the ring lives when it’s not on him – but it’s not. It lives on his bedside table when not living on him. And let’s not even get started on the whole “taking it off in the first place” thing (I never take mine off).

Needless to say, I am not going to throw it down a storm drain. But I have decided I’m just going to do weird things with it and take photos.

Yep, that’s your ring in my mouth, babe.

Here I am pretending I am a bull. If I could have actually put it in my nose, I would have

And this is a dramatic reenactment of what happened when I almost accidentally (I swear!) dropped it down the sink:

And here’s what I imagine my face would have looked like immediately after it had gone in, if it had in fact gone in:

But, luckily, the ring did not fall down the sink – and I hope to have many more (hopefully more creative) photo shoots with Trevor’s ring in my future. Unless he just wants to start keeping track of it better/wearing it all the time.

photo booth props

1 Jun

Since my brother’s wedding is officially only about a week away, I decided I should probably get around to making the photo booth props I said I would. I wanted something sturdier than paper/cardstock, so I decided to try foam core, on the advice of a d.i.y. tutorial.

Let me tell you, that ish is hard to work with. In theory it seems simple. 1. Trace desired shapes, 2. Cut them out, 3. Paint/spray/decorate them and glue on the wood dowels. Easy, right?

Except cutting through foam core without massacring the edges, let alone the shape itself, is next to impossible. Luckily, painting said foam core after the fact really disguises those flaws pretty well. Still, after three only semi-successful prop attempts with the foam core,  I was on the verge of resorting to the heaviest cardstock I could find when Trevor pulled some “fun foam” out of his ass.

Okay, it actually came out of the crafter’s paradise that is his office. But who else just has this stuff lying around? I’ve never been happier that my husband is so craft-y. This stuff is amazing. It’s thinner than the foam core and because it is more solid, the shapes I cut out actually resemble what I originally traced. The only downside is that the material isn’t as paint-friendly, and right now he only has green colored fun foam on hand. I’m going to Michael’s tomorrow and I hope they have some different colors for me to work with.

Anyway, I still need to attach the dowels, and make more props, but this is what I’ve got so far:

food rut

14 May

I have been in a food rut, for – I feel like – going on two years.

Lately, though, I’ve been trying to eat a little healthier (smaller portions, more veggies, less breads/pastas) – nothing revolutionary, just trying to instill some better habits. But I keep coming up against the fact that I eat the same three or four things over and over and over again – not only does it get old, but also none of those things fulfills the aforementioned “eating healthier” kick I’m on. Here is what I eat (over and over again) on a regular basis:

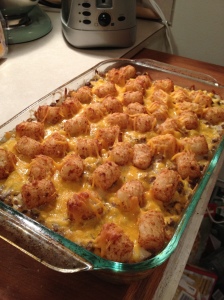
Frozen ravioli or tortellini with either brown butter and parmesan or canned meat sauce.

Noodles with butter and seasonings. Occasionally alio e oilo (spaghetti with olive oil, garlic, and red chiles).

Frozen entrees (usually pastas again, or Pot Pies)

Note that almost all of these revolve around pasta – note also that there are no veggies to be seen. Note, thirdly, that all of them are quick and easy to prepare. I like to cook, but working six days a week plus being broke does not always lend itself well to that endeavor. I’m about to – finally- be back at five days a week at work, and I’ve been out of school for over a month now, so I am hoping to get into a more regular cooking routine. Still, even when I cook more involved meals, I generally cook one of these 6 things:

Ground beef and onion gravy over mashed potatoes

Chicken enchiladas with mexican rice

Bacon-wrapped mock filets with mashed potatoes

Breakfast (fried eggs, bacon, toast)

Chicken tettrazini or pasta w/cream sauce casserole

Spaghetti Carbonara

Again, note the preponderance of pasta/bread-y carb-y-ness and complete lack of veggies. As many people before me have found, it’s hard to eat healthy when you want it to be a.) quick, and b.) inexpensive – but then for me, I feel like you have to also add on c.) like anything you would normally eat. And that makes it even harder. So eating healthier, for me, is not just about changing habits like how much I eat at one sitting, but it’s also about trying new things, branching out and adding more variety into my diet.

Things I’ve tried lately (and loved!):

Thinly-sliced apple on top of a toasted bagel with cream cheese – drizzled with honey. Or the same thing but with Feta instead of cream cheese.

Orange slices and chopped pear, mixed with fresh mint crushed with equal parts sugar. Last night I added some mixed greens and a balsamic vinegarette to take it from snack to salad.

Quiche with cheat’s frozen pie crusts. Broccoli, cheddar, onion, heavy cream, eggs – cook up the broccoli and onion a bit, add everything together, pour into pie crust, pop in oven and wait 40 minutes. So easy, and so filling, and I can’t wait to try it with different ingredients! This is especially great for someone like me, with eating habits still somewhat resembling those of a nine-year-old who has to be forced to eat vegetables by hiding them/slathering them in butter or other bad stuff.

All three of those new-to-me recipes came from Offbeathome’s Cooking Challenge. Because I read offbeathome.com regularly, they were just kind of thrown in my lap, which I think it what made the difference. They looked like interesting things to eat, so I tried them. When I’m usually looking for new ideas for things to cook, it’s hard to think outside my own little cooking box – so even just finding a recipe that is appealing but different from what I normally would gravitate to is challenging.

Initially I told Trevor that my attempts to eat healthier would probably require grocery trips every few days, which was exhausting even just to talk about much less actually do. I do think the days of once-every-three-weeks grocery trips need to go the way of the dodo, since that always means great meals the first couple days and then shit for the rest of the three weeks since freshness is a factor. But the idea of going to the grocery store every other day is also just…ugh. So if I can be a little more creative about what we eat and how we use different ingredients hopefully I can get away with a once a week trip. I think this is definitely going to require meal planning, though, and that has always been a challenge.

I’ve heard of services where they send you a recipe a day or a weeks worth of meal plans, and I’m seriously starting to think maybe this is a worthwhile idea. I’ve always scoffed at this idea, like, jeez, I don’t need someone to tell me what to eat. But actually, I think that’s EXACTLY what I need at this juncture in my life.

One of the things that really impresses me is when people make a grocery list wherein they use several of the same ingredients in multiple dishes throughout the week – without the dishes being the SAME dish or even overly similar. This is a skill I really have not been able to grasp. I eat leftovers, so I almost never cut a recipe in half even if it’s for 8 people and I’m just feeding my husband and me – we will (usually) get to it all in the course of a week, although then I don’t make that dish again for a few months because we’re so over it at that point. The idea of being able to eat something different every night without having to go to the grocery store 3 or 4 times a week is really appealing, so I feel like this would be a useful skill to have – I think it just requires a lot more creativity than I currently possess in terms of repurposing different foods in different ways AND  making sure a leftover doesn’t feel like one.

Clearly I’m familiar with the idea of staples – mine are just bad for you: pasta, rice, etc. And I think it’s helpful to kind of rethink the idea of a staple – I’ve always thought of it as something on hand all the time, which necessitates that it needs to be packaged/processed/frozen food, which also is not good for you. If I can start to reimagine the staple as something that is just on hand for a bit, that might go a long way. For example, I used apples 3 different ways in 3 different recipes this last week – clearly, an apple won’t stay good forever, I can’t just have them in the shelves at all times, but I sort of made it my staple-of-the-week by using the same batch from the same grocery trip in multiple ways. I just need to get better at doing this more often.

Lastly, I read an article in the NYT the other day profiling Peter Kaminsky’s efforts to “eat well by focusing on healthy items that deliver maximum flavor” that has also kind of inspired me. I am not a big fan of overpowering herbs, curries, seasonings, etc. – but I do think there is something to the idea that if you focus on the flavors you like (in my case, tarragon, thyme, mint, onion, garlic) and use them more liberally, you kind of get more bang for your buck, which might help you to eat less food over all. As the writer of the article explains, “the idea is that by amping up the taste, you can satisfy your cravings with smaller portions”.

I am by no means espousing covering everything I eat in mint or using WAY too much garlic – but I do think that if I choose foods that are more flavorful and make smart decisions re: adding flavor where needed, it will probably help me to feel more satisfied with what I’m eating and therefore eat less of it.

Anyway, to all these various ends, I’m on the lookout for new-to-me, flavorful, non-pasta recipes and if you have a meal planning service or tool that you love – or even just some tricks of the trade you’d like to share – I would appreciate it greatly if you would send it my way!